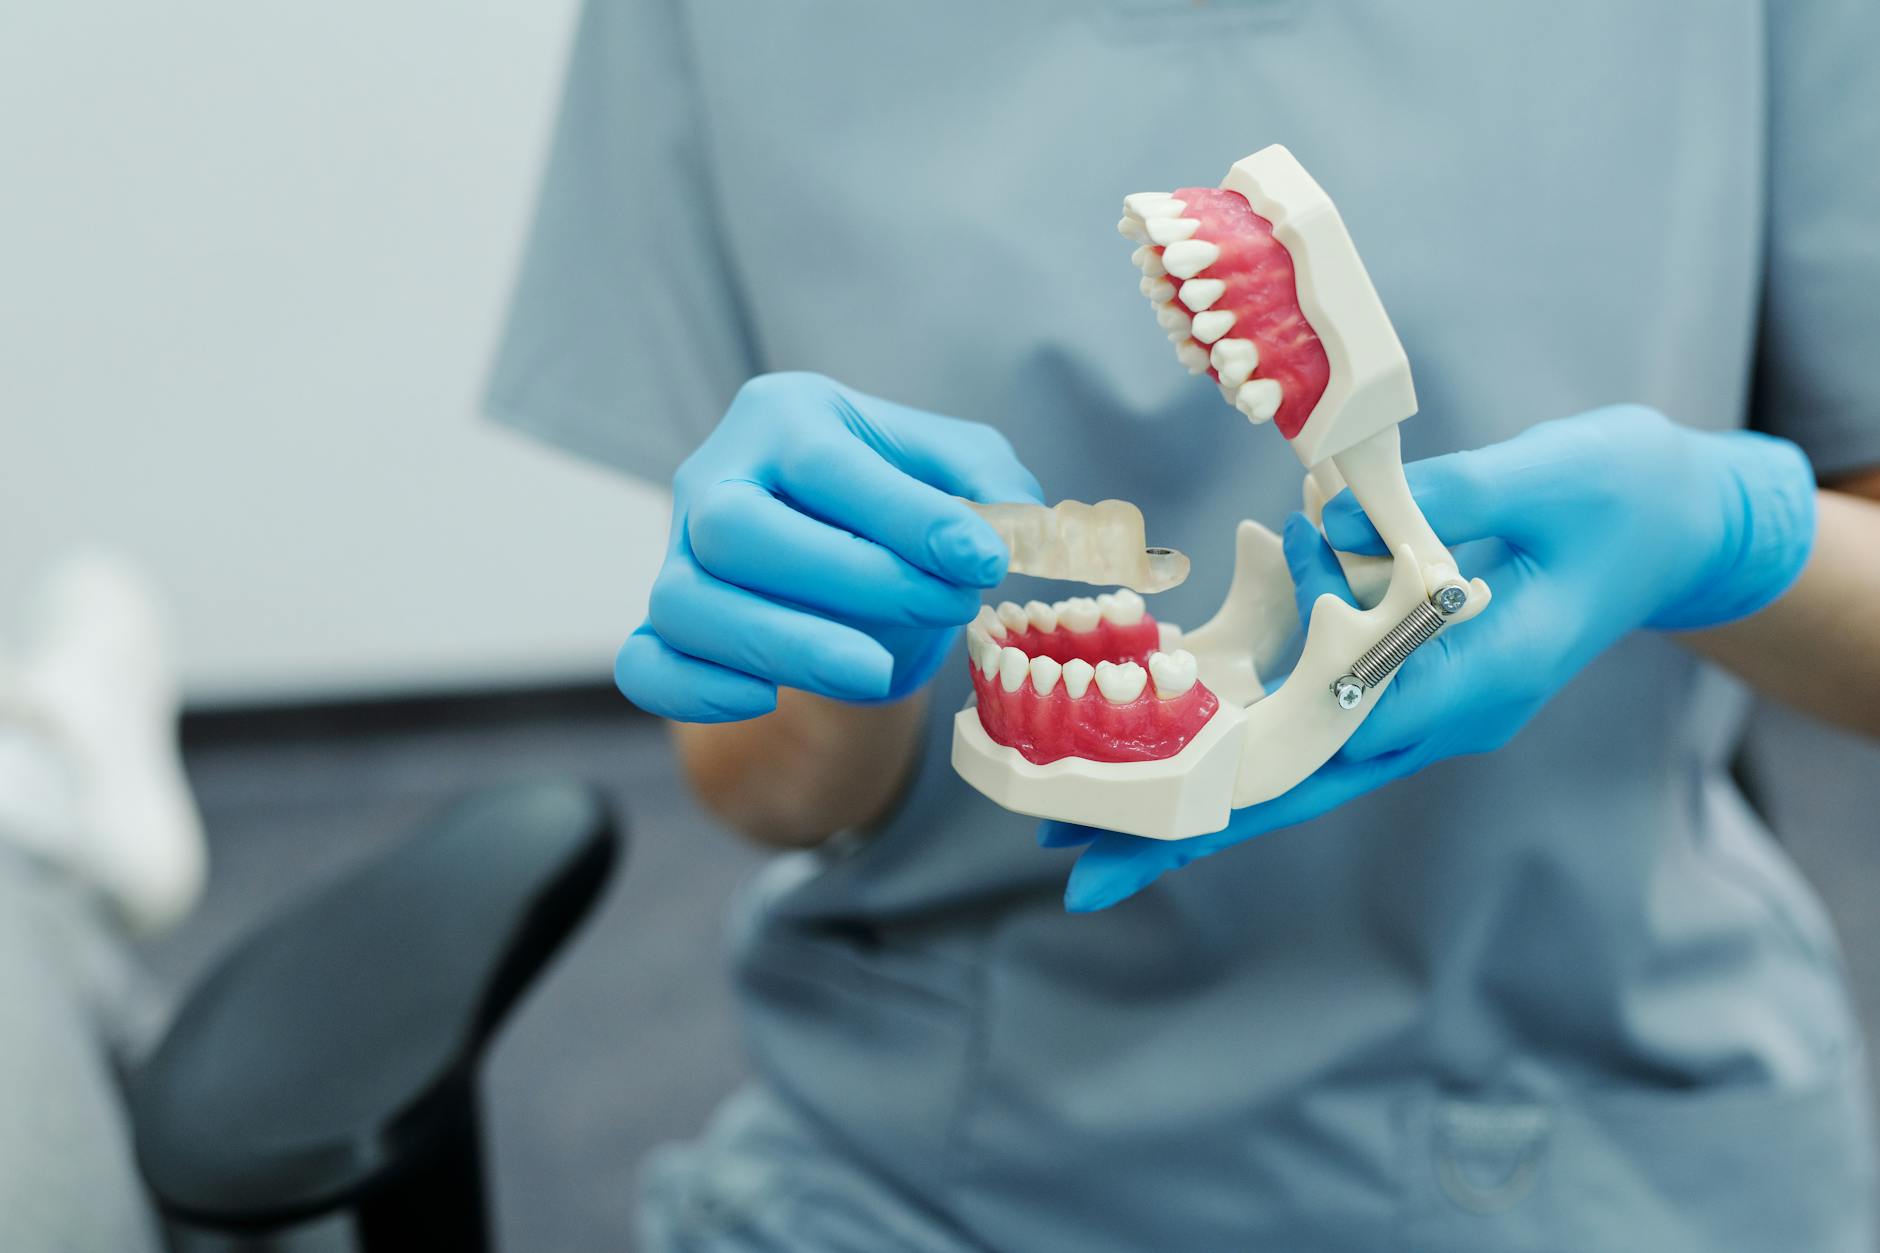
Understanding Translucency in Dental Veneers
Translucency is how light passes through a veneer, just like it does through natural enamel. The right translucency makes a veneer look lifelike instead of flat or chalky. The “halo” is a soft, brighter line at the very edge that real teeth often show in strong light. Together, these features help veneers blend with your smile.
Picture sunlight hitting the edge of a front tooth. Enamel scatters light, which creates subtle brightness and depth near the edge, sometimes a faint halo. Veneers can be designed to mimic this by adjusting ceramic layers and surface texture. Understanding translucency and halo effects veneers helps explain why some smiles look natural.
- Ceramic type: some are more glassy and let more light through.
- Thickness: thinner edges transmit more light, thicker areas look more opaque.
- Opacity and shade: “high-value” or opaque layers can mask dark teeth.
- Cement shade: resin color can slightly shift the final look.
- Tooth color underneath: the darker the tooth, the more masking is needed.
- Surface texture and glaze: micro-texture changes how light reflects.
Thickness strongly affects the final color and depth you see, so careful layering is key [1]. Core and veneer combinations also change translucency and masking ability, which guides material choice for each case [2]. If the tooth is dark, we may use a slightly more opaque design to prevent show-through, then add lifelike translucency near the edges for balance. Try-in pastes help preview these effects before bonding, improving shade match and patient confidence.
In a smile makeover, we map where you want brightness, depth, and a gentle edge halo. That plan guides tooth preparation, ceramic layering, and cement selection. To see how these choices fit your goals, you can explore how porcelain veneers are planned and delivered. If the natural teeth are significantly stained, whitening before veneer planning can reduce the need for opacity and keep a more translucent, natural look; learn more about professional teeth whitening options. The right translucency makes veneers look like real teeth.
The Role of Halo Effects in Aesthetics
The halo is the soft, brighter rim at the biting edge that many natural teeth show in strong light. In aesthetics, it frames the edge, lifts brightness, and adds depth so veneers do not look flat. A well‑placed halo can make a veneer blend with neighboring teeth and look convincing in photos and real life.
Think of smiling under bright bathroom lights and noticing a pale rim at the edge. That effect happens because light scatters and reflects inside enamel, then back toward the viewer at the very thin incisal edge. Ceramists recreate it by adding a narrow band of opalescent or slightly higher‑value ceramic at the edge, then blending into the more translucent incisal zone. Edge thickness, a subtle cutback, and final polish level help control how strong the halo appears. Understanding translucency and halo effects veneers can help you see why these edge details matter.
Clinically, the halo is adjusted to the person. A stronger, crisper halo can reduce a gray look when there is a dark mouth space behind open teeth, while a softer halo suits a younger or more delicate style. Too much looks chalky; too little looks dull, especially under camera flashes. We often preview halo intensity in provisional mock‑ups or with high‑quality photos, then fine tune before final glazing. In small cases, careful incisal edge dental bonding adjustments can soften or sharpen the halo without replacing a veneer.
When only one front tooth needs full coverage, the halo helps the restoration match its neighbor in many lighting conditions. Heavily restored or cracked teeth might be better served with a crown that still carries a controlled halo at the edge for harmony; see how we approach custom crowns and bridges for front teeth. Next, it helps to understand how technicians layer porcelain to build these optical cues. Small edge choices make big differences.
How Translucency Mimics Natural Teeth
Translucency makes a veneer behave like enamel. Light can pass into and through the material, then scatter back to your eye, which creates depth and a gentle edge glow. When ceramics control this light in a similar way to natural enamel, the result looks convincing in many lighting conditions. Under a skylight, front teeth show a soft glow at the edges.
Enamel is not simply clear. It forward‑scatters light through tiny prisms, shows opalescence that looks slightly bluish at the edge, and lets warm dentin color show through the middle. High‑quality ceramics mimic this by combining a glassy matrix with opalescent and fluorescent components that imitate enamel’s scattering and subtle daytime “glow” [3]. Patients often ask how translucency and halo effects veneers produce lifelike edges. The answer is in how these layers guide light, soften transitions, and keep the tooth from looking flat.
Clinically, the amount and location of translucency are adjusted carefully. If there is too much at the biting edge, the tooth can look gray in photos with a dark background; if too little, the tooth can look dull. We shape a thin incisal zone that lets light in, while keeping key areas slightly more opaque to maintain body color. Newer translucent zirconia options increase light transmission in front teeth compared with traditional formulations, which helps match neighboring enamel when used thoughtfully [4]. In both ceramics and composites, layering materials with different translucency and opacity can reproduce the dentin‑enamel complex and its natural depth [5].
For patients, this means your veneers are planned to look real in sunlight, office light, and camera flash. We review photos under different lighting and discuss how much incisal glow you prefer before finalizing the design. If you are scheduling a visit, you can check our current hours. Translucency, used thoughtfully, makes veneers look like real teeth.
Materials That Enhance Translucency
Translucent veneers come from materials that let light in and out in a controlled way. Glass‑rich feldspathic porcelains, carefully layered lithium disilicate, and newer translucent zirconias are common choices. Each material handles light differently, so selection depends on tooth color, needed masking, and veneer thickness. The goal is a bright edge with natural depth, not a flat, opaque look.
In bright daylight, a thin enamel‑like edge glows softly. Feldspathic porcelain contains a high glass content, which gives excellent incisal translucency and lifelike opalescence. Lithium disilicate combines a glass matrix with crystal reinforcement, balancing strength with realistic light transmission, especially when a cutback and enamel layering are used at the edge. Translucent zirconia formulations improve light passage compared with traditional zirconia, which helps when matching neighboring enamel, but they typically need thoughtful design to avoid a gray appearance if the tooth underneath is dark.
Beyond the base ceramic, specialized “enamel” and opalescent porcelains enhance edge brightness and the subtle blue‑white character seen in natural enamel. Small internal effects, such as faint incisal characterizations or halo bands, can be added in thin layers to frame the biting edge. For translucency and halo effects, veneers rely on materials that transmit and scatter light. Surface texture also matters; micro‑texture breaks up reflections, so the veneer shows depth in different lighting rather than a mirror‑like shine.
Cement choice supports the material’s optics. A neutral, light‑transmitting resin with a refractive index close to the ceramic helps keep the incisal zone clear. Try‑in pastes preview the final look before bonding, which is helpful when deciding how much translucency to show at the edge versus how much opacity to use over darker areas. Thickness control is critical as well, since thin edges transmit light better, while slightly thicker body zones maintain the tooth’s base color.
For patients, the material mix is chosen to match your teeth, your lighting, and your style preference. Next, we focus on how layering and surface finishing shape these optical cues into a natural smile. The right materials make realistic light behavior possible.
Techniques for Achieving Halo Effects
To create a natural halo at a veneer’s biting edge, we shape space for light, then place and finish porcelains that brighten the rim. Technicians add a thin band of opalescent or slightly higher‑value ceramic at the incisal edge, and blend it into more translucent enamel layers. Final polish and texture control how strong the halo looks in real life and in photos.
Picture a selfie under bright bathroom lights where the edges look gently brighter. That comes from a planned “incisal cutback,” which makes room for enamel porcelains that scatter light forward. A narrow, feathered band near the edge lifts value without turning the tooth chalky. Just behind it, clear opalescent porcelain gives a subtle blue‑white glow, while the body stays warm and natural.
Preparation design supports the effect. A small, even incisal reduction creates space so the ceramist can layer without over‑thickening the edge. A silicone reduction guide from the wax‑up helps keep that space consistent tooth to tooth. During build‑up, the halo band is kept thin and well blended, and internal character is placed sparingly so the edge stays bright, not busy. Controlled micro‑texture and a graduated polish, slightly higher at the edge and softer on the facial, direct reflections and make the halo read cleanly.
At try‑in, we check halo intensity under several lights, including a dark background view to catch any gray show‑through. Neutral try‑in pastes help confirm that cement will not wash out the edge effect. If the look is too sharp, the ceramist can soften the band, reduce surface gloss, or add minimal enamel translucency. If it is too dull, a touch more value at the rim or a crisper texture often solves it. Understanding translucency and halo effects veneers helps you see why these steps matter.
For patients, the benefit is a veneer that holds its edge brightness on camera and in daylight, matching nearby teeth naturally. These careful steps let small edge details make a big difference. Small refinements at the edge create a believable smile.
Case Studies on Veneer Aesthetics
Case studies on veneer aesthetics show how small design choices change realism. They track starting shade, the plan, and the final look in different lights. These reports help patients and clinicians see how edge brightness, translucency, and texture work together.
A patient wants one front tooth to match under bright office lights. When a single tooth is discolored, successful cases often combine masking in the body with a clear, lively edge so it does not look gray. Published reports show that high‑opacity lithium disilicate crowns can hide dark substrates while maintaining a natural appearance, and that principle guides veneer planning for similar single‑tooth challenges [6]. Photographs at try‑in help decide how much incisal glow and halo to keep for a believable match.
Gap closure creates different choices. In midline diastema cases, porcelain laminate veneers can close space while reshaping line angles to avoid a “too wide” look, as documented in clinical case reports [7]. The ceramist typically keeps a thinner, more translucent edge for light entry, then adds a gentle halo band to prevent a flat, painted result. This sequence lets the new contact emerge naturally, with brightness focused at the rim and warmth in the body.
Full‑smile makeovers often stage care. Alignment first, then minimal‑prep veneers, can reduce aggressive tooth reduction and keep enamel for bonding. Clear aligner orthodontics, such as Invisalign before veneer planning, is commonly shown in case series to improve symmetry and reduce the need for heavy masking. In complex situations, authors describe combining different ceramic systems and adhesive approaches to balance strength, color control, and lifelike light behavior [8]. Seeing these steps in real cases makes translucency and halo effects veneers easier to understand.
For patients, these examples explain why your plan may include alignment, provisional mock‑ups, and photo reviews before final veneers. The goal is a smile that looks real in sunlight and on camera. Small optical choices add up to natural results.
Challenges in Replicating Natural Appearance
Making veneers look like real teeth is hard because enamel is complex and changes with light. Real teeth show depth, a gentle edge glow, and fine texture that shift from room to daylight. Veneers must balance these effects with strength and proper masking. Even small missteps can make a tooth look flat, gray, or too bright.
You step outside after a selfie and the tooth looks different. Light sources change color perception, a problem called metamerism, so veneers that match under one light may mismatch under another. Tooth dehydration during long visits can also make teeth look lighter, confusing shade selection. Careful try‑ins under several lights, short dry times, and rehydration checks help keep the final color honest.
Tooth color underneath drives many compromises. Dark substrates need more opacity to prevent show‑through, yet too much opacity kills the sense of depth. Thin incisal edges look lively, but if they are too thin, they can appear gray against a dark mouth space or risk chipping. The halo must be firm enough to frame the edge, but not chalky. Surface texture and a controlled, satin‑to‑gloss polish are critical; a perfectly smooth surface can reflect like plastic, while micro‑texture breaks up light and restores natural depth.
Symmetry adds another layer. Matching one front tooth to its neighbor is the toughest task because tiny differences in value, translucency, or halo strength are easy to spot. Shade maps, high‑quality photos, and provisional mock‑ups guide the ceramist on where to place brightness and translucency. Understanding translucency and halo effects veneers helps explain why small adjustments in edge design and texture change the whole look.
For patients, this means planning goes beyond a single shade tab. Tell us where your teeth look brightest in real life, and which lights matter most to you. With careful checks, we can design a smile that looks natural indoors, outdoors, and on camera. Small optical choices make a big difference.
Importance of Shade Selection
Shade selection sets the base color and brightness of veneers, so everything else reads as natural. If the value is too high or low, even perfect translucency and a crisp halo will look wrong. Good shade choice matches the body color, blends the neck and edge zones, and keeps the smile consistent in different lights.
You hold a shade tab to your tooth in sunlight. That quick check matters, but it is only the start. Teeth are not one color, so we map three zones: warmer at the neck, true body color in the middle, and a brighter, more translucent edge. This guide tells the ceramist where to place warmth, where to keep value, and where to let light in at the incisal. It also prevents a flat, single‑tone result.
Underlying tooth color and veneer thickness change what you finally see. A darker tooth needs a slightly more opaque body to avoid show‑through, yet the edge should stay light and lively. Resin cement can shift color subtly, so we preview with try‑in pastes to confirm value and chroma before bonding. This step also helps decide whether the halo band should be firmer or softer for harmony.
Lighting and timing affect shade decisions. Metamerism means a match under operatory lights may differ outdoors, so we verify under several light sources and with neutral backgrounds. Teeth dry during appointments and look lighter, so final shade is chosen after rehydration. Digital shade tools and polarized photos improve communication, but a detailed shade map still guides the ceramic layering that creates depth.
For single‑tooth cases, value control is the priority, then fine adjustments in translucency at the edge and subtle characterization to mirror the neighbor. Discuss where your teeth appear brightest and how bold you want the rim glow. Understanding translucency and halo effects veneers makes it easier to choose a shade plan that looks real in daily life. The right shade makes every other aesthetic detail work.
Post-Placement Care for Veneers
After veneers are placed, care is simple: brush gently with a soft brush, use a low‑abrasive fluoride toothpaste, and clean between teeth daily. Avoid biting hard objects, like ice or pens, and do not use teeth to open packages. For the first day or two, minimize very dark foods or smoking to reduce early stain at the margins. Regular checkups let us polish and protect the surface so it keeps its natural look.
On day one, you might wonder what is safe to eat or drink. Eat normally, but favor chewing with the back teeth for a few days while you get used to the new edges. If you clench or grind, a custom night guard protects the thin incisal zone that gives veneers their lifelike brightness. Sports mouthguards help prevent chips during contact activities.
Daily cleaning preserves the surface glaze that makes veneers look like enamel. Use gentle strokes near the gums and slide floss along the tooth, not into the gum. Water flossers are fine when aimed along the gumline, not directly at the margins. If a seed or shell chips an edge, avoid picking at it; small chips are often smoothed or repaired without replacing the veneer.
Acids and abrasives dull shine. Sip acidic drinks, then rinse with water, and wait 30 minutes before brushing to protect enamel and ceramic surfaces. Skip charcoal or whitening pastes on the veneers themselves; if you want a brighter smile later, we can discuss options that respect the ceramic. At maintenance visits, we use porcelain‑safe polishing to restore luster without thinning the veneer. This keeps the incisal glow and fine texture that read well in photos and daylight.
Understanding translucency and halo effects veneers helps explain why gentle care keeps the edge bright and the body color stable. If sensitivity occurs, it is usually mild and settles within a week or two; a desensitizing toothpaste can help. Call if you notice looseness, roughness, or a crack so we can address it early. Good habits keep veneers looking real for years.
Combining Function and Aesthetics in Veneers
Veneers should look natural and work comfortably when you chew and speak. We design the shape, edge position, and surface finish so teeth look lifelike and also guide your bite safely. You bite into an apple and the edge feels natural. Good veneer design protects enamel, gums, and ceramic while keeping a bright, convincing smile.
Function starts with the bite. The incisal edge is placed inside your “envelope of function,” so front teeth glide without bumping and chipping. Canines are shaped to share side‑to‑side guidance, which reduces stress on thin edges. Phonetics are checked too. F and V sounds help confirm edge length, and S sounds help set space so speech stays clear.
Long‑term comfort depends on support and bonding. Keeping margins in enamel improves adhesion and helps the veneer resist debonding. We avoid over‑bulk near the gums, since flat, cleanable contours reduce plaque and inflammation. Contacts are polished so floss passes smoothly, and the bite is refined to remove tiny interferences that can start cracks. If a tooth has heavy wear or large fractures, we may discuss whether a different restoration would better share forces.
Appearance is built into these choices. Edge thickness is set to allow light entry for depth, while body areas keep color stability. Micro‑texture breaks up reflections so the surface looks like enamel in many lights. Patients who clench or grind often benefit from a night guard, which protects thin incisal zones and preserves surface luster. Understanding translucency and halo effects veneers is useful, but those optics must be paired with a balanced bite and cleanable shapes to stay beautiful.
At try‑in, we test smile line, speech sounds, and guidance under light chewing, then fine tune before final glazing and bonding. After placement, small adjustments are common as you adapt. This blend of optics and mechanics helps your veneers look real and feel natural day to day. Form and function should support each other.
Patient Expectations for Lifelike Results
Lifelike veneers aim to look like real enamel in every light, not just in the mirror at the office. You can expect careful planning of color, edge brightness, and surface texture so teeth appear natural in photos and daily life. We review your goals first, then design the optics to match them. You should leave with teeth that feel comfortable and look believable up close.
You glance in a car mirror and want the edge to glow, not look flat. That “real” look comes from balancing a bright, clean rim with gentle depth through the middle of the tooth. Before bonding, we preview the design with photos, mock‑ups, and try‑in shades so you can judge the look under different lights. This step helps catch issues like a gray edge against a dark background or a halo that appears too sharp.
Expect honest trade‑offs. A darker underlying tooth often needs slightly more masking in the body to prevent show‑through, which can soften edge translucency. To keep a natural look, we focus brightness at the rim, add controlled translucency near the edge, and keep warmth where it belongs in the middle. Matching a single front tooth is the most demanding, so we prioritize value first, then fine‑tune halo strength, micro‑texture, and small character to mirror the neighbor. Understanding translucency and halo effects veneers helps you see why these choices matter.
Function and comfort guide the final shape. We confirm edge length with speech sounds, refine the bite so thin edges are protected, and smooth contacts so floss passes easily. If alignment or gum levels limit realism, we will discuss staged care, such as minor orthodontic adjustment or tissue contouring, to improve symmetry with less ceramic bulk. After placement, small adjustments are common as you adapt, and we polish surfaces to maintain a natural sheen.
Plan for maintenance. Gentle home care and routine checks preserve the glaze that makes veneers read like enamel in many lights. Bring reference photos of smiles you like, and tell us where you want brightness to show. With shared planning and realistic goals, lifelike results are achievable. Clear expectations lead to natural outcomes.
Future Trends in Veneer Technology
Future veneer technology is moving toward more natural results with less drilling. Expect smarter digital planning, stronger yet translucent ceramics, and faster, more precise fabrication. These updates aim to match real enamel in many lights while protecting tooth structure.
You try in a printed mock-up and see your new edges under daylight. Digital workflows are expanding, from 3D facial scans and intraoral scans to virtual smile design and guided preparation. These tools improve planning accuracy and help preview edge brightness before any drilling. Laboratory steps are increasingly automated, which can standardize results and reduce remakes [9].
Chairside and lab CAD/CAM systems continue to mature. Multilayer blocks with gradient value and translucency support lifelike incisal zones without heavy layering. Combined with calibrated photography and spectrophotometry, shade matching is more repeatable. Broader CAD/CAM adoption links the design to the final ceramic with fewer handoffs [10].
Materials are evolving toward higher strength with better light transmission. High‑translucency zirconia and refined lithium disilicate options allow thin restorations with controlled edge glow when designed carefully [11]. Research is exploring bioinspired multilayer ceramics, improved surface treatments, and resin cements that keep clarity over time. AI tools are emerging to map texture and predict shade under different lights; they support, not replace, clinical judgment. Understanding translucency and halo effects veneers helps guide these new designs.
For patients, this means shorter visits, clearer previews, and veneers that look real in selfies and sunlight. At consultation, we will review digital mock‑ups, discuss where you want brightness, and plan minimal drilling when possible. As these technologies grow, the goal stays the same, a believable smile with healthy tooth structure. Thoughtful tech should make results more natural, not more artificial.
Frequently Asked Questions
Here are quick answers to common questions people have about Translucency & Halo: Making Veneers Look Real in Glendale, AZ.
- What is the role of translucency in veneers?
Translucency allows light to pass through veneers as it does through natural enamel, giving teeth a lifelike appearance. Proper translucency avoids a flat or chalky look, instead letting your veneers capture depth and vitality. This optical trait mimics enamel’s behavior, ensuring your veneers look natural in varying lighting conditions. The porcelain materials used in veneers are specially crafted to scatter light in a way similar to real teeth, which helps create a bright yet natural smile.
- How do halo effects enhance the appearance of veneers?
The halo effect is a bright rim at the edges of teeth that adds depth and brightness, much like natural teeth under light. This feature ensures that veneers don’t look flat. The halo effect is achieved by adding a slight band of opalescent ceramic at the biting edge. Carefully controlling this effect as part of veneer design helps veneers blend seamlessly with adjacent teeth and maintain a natural look in photographs and reality.
- What materials are used to enhance translucency in veneers?
Veneers use materials like glass-rich feldspathic porcelain, lithium disilicate, and translucent zirconia to enhance translucency. These materials handle light in distinct ways and are chosen based on factors like tooth color and needed masking. For example, feldspathic porcelain provides excellent translucency and opalescence, while lithium disilicate balances strength with light transmission. Translucent zirconia improves upon traditional zirconia to better match natural enamel’s light characteristics.
- How is shade selection important for veneers?
Shade selection sets the base color and brightness of veneers, ensuring they blend naturally with your existing teeth. This involves mapping out warmer tones near the gums, a true body color in the middle, and a brighter edge. Correct shade selection prevents a flat appearance and maintains consistency across different lighting conditions. Using try-in pastes helps confirm the match before final bonding, ensuring veneers look natural in all lights.
- What challenges are involved in making veneers look natural?
The challenge in making veneers look natural comes from mimicking enamel’s complex interaction with light. Issues like metamerism can cause veneers to appear different under varying lighting conditions. For heavily stained teeth, balancing opacity to prevent show-through while maintaining depth is crucial. It’s also vital to replicate enamel’s natural texture and edge glow without making veneers look too flat or overly bright. Attention to these details ensures a lifelike appearance for your veneers.
- Why are case studies important in veneer aesthetics?
Case studies in veneer aesthetics provide valuable insights into how design choices affect the final appearance of veneers. They track the impact of starting shade, plans, and how veneers look under different lighting conditions. These studies help dental professionals refine techniques to achieve more natural results. Seeing real-life examples of veneer application allows for better understanding of how elements like translucency and halo effects contribute to overall aesthetics.
References
- [1] Influence of thickness on color in multi-layering technique. (2007) — PubMed:17825404 / DOI: 10.1016/j.dental.2007.06.026
- [2] Translucency of ceramic material in different core-veneer combinations. (2015) — PubMed:25277036 / DOI: 10.1016/j.prosdent.2014.07.011
- [3] An engineering perspective of ceramics applied in dental reconstructions. (2023) — PubMed:36820784 / DOI: 10.1590/1678-7757-2022-0421
- [4] Novel translucent monolithic zirconia fixed restorations in the esthetic zone. (2022) — PubMed:35280077 / DOI: 10.1002/ccr3.5499
- [5] Direct esthetic restorations based on translucency and opacity of composite resins. (2011) — PubMed:21477031 / DOI: 10.1111/j.1708-8240.2010.00392.x
- [6] Esthetic Rehabilitation of a Discolored Maxillary Central Incisor With a High-Opacity Lithium Disilicate Crown. (2025) — PubMed:41084707 / DOI: 10.7759/cureus.92150
- [7] Esthetic Management of Maxillary Midline Diastema Using Porcelain Laminate Veneers: A Case Report. (2025) — PubMed:41054688 / DOI: 10.7759/cureus.91586
- [8] Integrating Various Ceramic Materials and Adhesive Concepts to Achieve a Functional and Esthetic Result. (2025) — PubMed:41043163
- [9] The future of dental devices is digital. (2012) — PubMed:22119539 / DOI: 10.1016/j.dental.2011.10.014
- [10] The use of CAD/CAM in dentistry. (2011) — PubMed:21726690 / DOI: 10.1016/j.cden.2011.02.011
- [11] Zirconia in fixed implant prosthodontics. (2012) — PubMed:21176095 / DOI: 10.1111/j.1708-8208.2010.00317.x