Understanding Nonvital Teeth
A nonvital tooth is a tooth whose pulp has died or has been removed, so it no longer has a blood or nerve supply. This often happens after deep decay, a crack, or a hit to the tooth. One day you notice a single front tooth has turned gray. Nonvital teeth can darken over time and sometimes feel different to bite on.
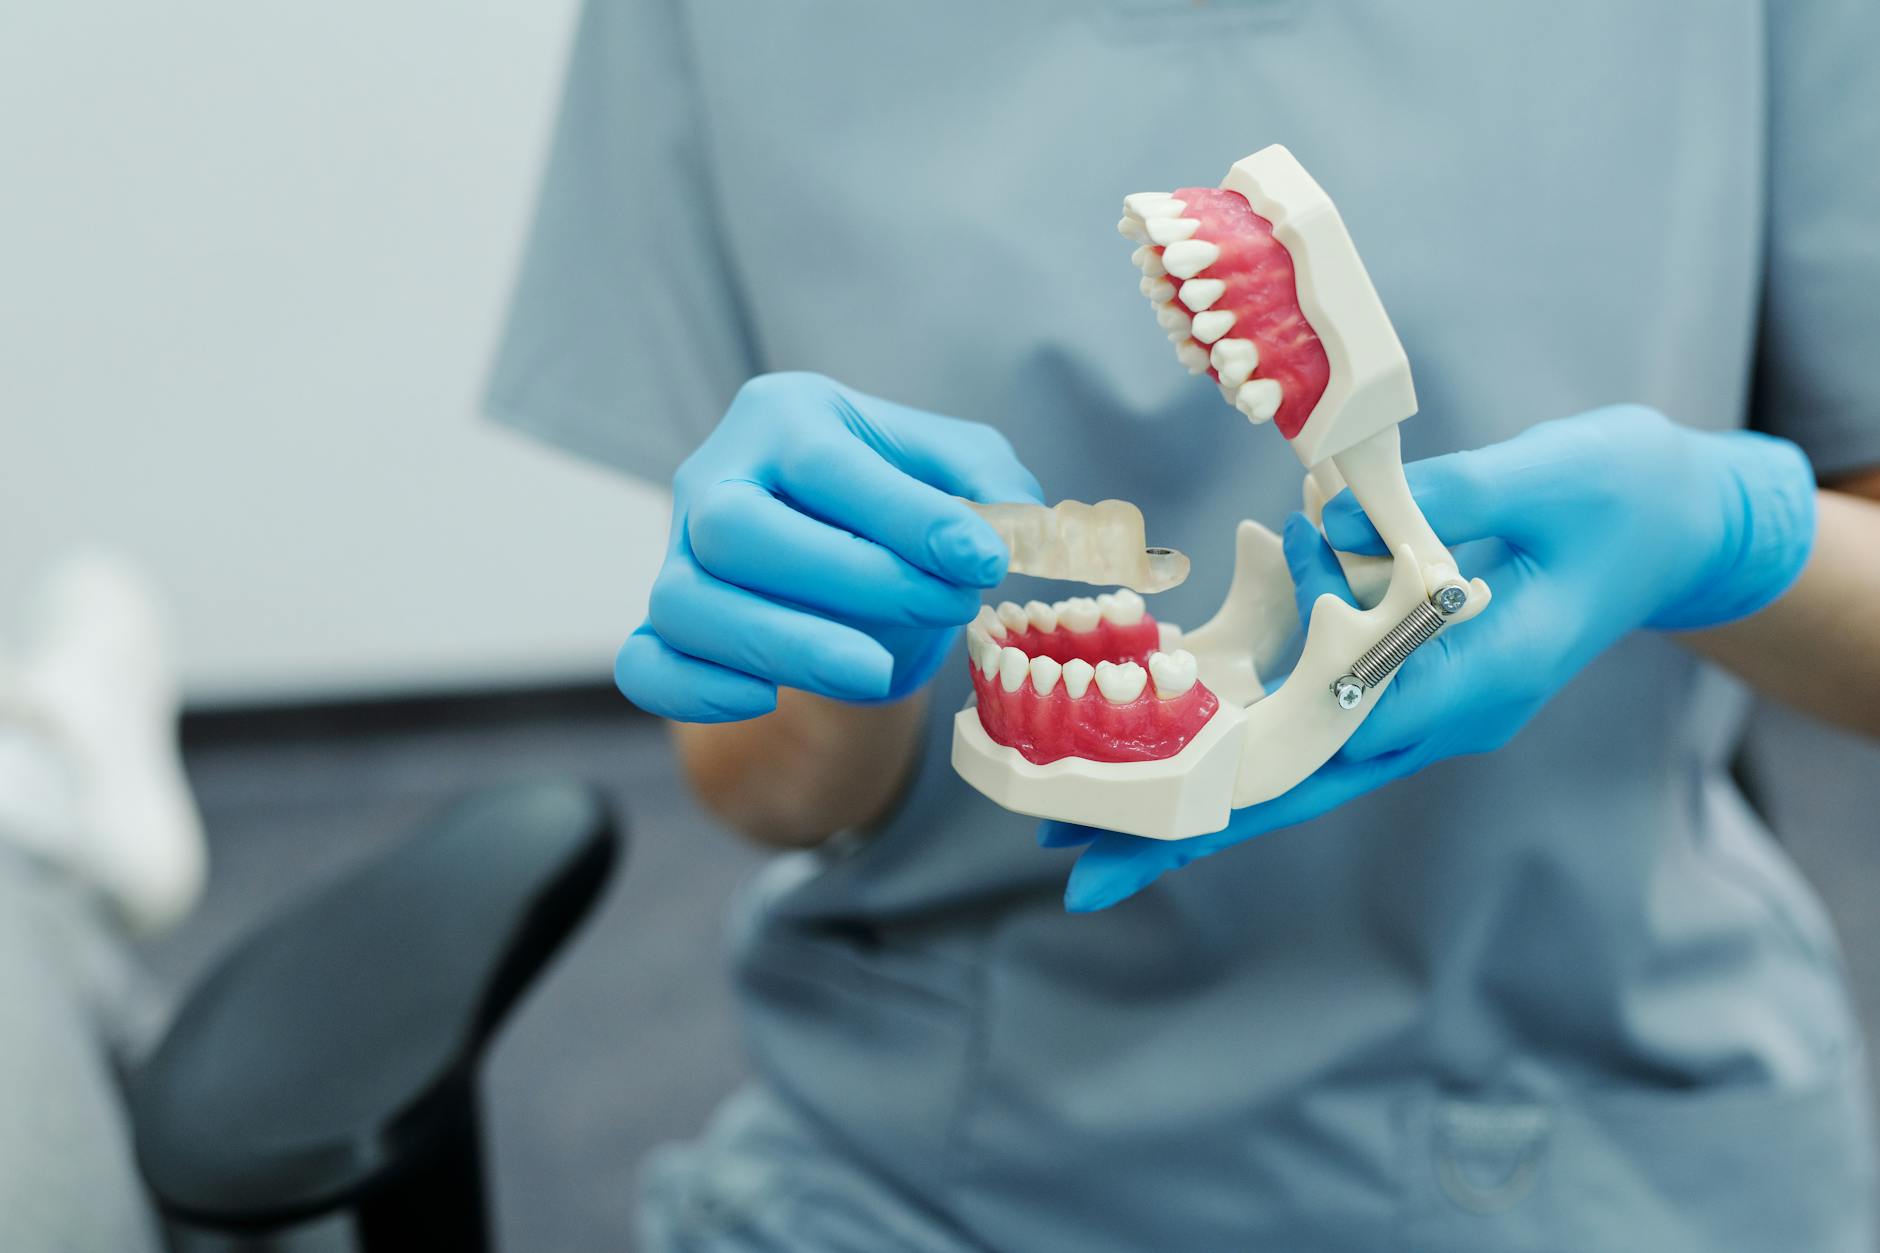
When the pulp dies, pigments from blood and tissue can move into tiny dentin tubules, which leads to internal discoloration. The tooth may be painless, or it may develop lingering tenderness, swelling, or a pimple on the gum if infection is present. Dentists use cold or electric tests to check vitality, then confirm with radiographs. Structure also matters. Teeth weakened by large cavities or prior drilling can be more prone to fracture than untouched teeth.
Understanding cause guides care. If infection is present, cleaning and sealing the canals with root canal treatment usually comes first to protect bone and gums. For color concerns after the tooth is sealed, internal bleaching of nonvital teeth can lighten the tooth from the inside. In a common “walking bleach” approach, a safe agent is placed inside the pulp chamber and the tooth is temporarily sealed for several days, sometimes repeated until the shade matches. A protective barrier is placed over the root filling to limit irritation to nearby tissues. Rare risks include external cervical resorption and temporary sensitivity, which is why case selection and proper barriers matter.
External whitening brightens the outer enamel of living teeth, but it does not predictably fix one dark nonvital tooth; that is why internal treatment is considered instead. If minor color differences remain after bleaching, conservative shaping or bonding may refine the final look. For broader smile color goals, supervised professional teeth whitening can complement the result.
Knowing whether a tooth is vital or not helps plan safe, natural-looking care. Understanding comes first, then the right technique.
The Process of Internal Bleaching
Internal bleaching lightens a dark, previously treated tooth from the inside. You want one dark front tooth to match its neighbors. After confirming the tooth is healthy and sealed, your dentist places a gentle whitening material inside the tooth and closes it with a temporary filling. The color is checked at follow-up and repeated if needed.
Here is a simple step-by-step outline of what to expect:
- Assessment and records: exam, radiograph, and a starting shade photo.
- Isolated access: a small opening is made on the back of the tooth, and old stain or filling material in the chamber is cleaned.
- Protection: a firm barrier is placed over the root filling to protect the ligament and bone.
- Whitening agent: an oxidizing paste is placed inside the chamber, then the tooth is sealed temporarily.
- Waiting period: 3 to 7 days allow the oxidizer to work; normal eating is fine.
- Re-evaluation: the shade is compared to neighbors; the process may be repeated until it blends.
- Finish: the paste is removed and a final restoration is placed; bonding is often scheduled after a short wait for best adhesion.
This approach targets stains trapped within dentin and avoids unnecessary drilling on the outside of the tooth. Most cases need one to three visits, depending on the starting shade and your goal. A well-sealed barrier and gentle oxidizers help limit irritation to nearby tissues. Your dentist will also avoid strong heat in the tooth, which is not needed for good results. The term you may hear for this is internal bleaching of nonvital teeth.
For you, this means a focused, conservative way to match one tooth to the rest of your smile. If a small edge chip or persistent spot remains after color matching, a touch of conservative dental bonding can refine the final look. Your dentist will guide timing and maintenance, including how long to wait before any new bonding so the color and adhesion remain stable. A careful process yields a natural blend.
Indications for Tooth Whitening
Tooth whitening is appropriate when teeth are healthy but darker than you would like, usually from surface stains or age-related changes. It is not a treatment for cavities, gum disease, or broken fillings. Whitening can help when coffee, tea, red wine, or tobacco have stained the enamel. Before a big photo, you notice your smile looks dull.
External whitening is designed for living teeth. It works best when enamel is intact, gums are healthy, and there are few visible fillings. Whitening does not change the shade of existing crowns, veneers, or bonding, so these may need replacing to match a lighter color. If deep developmental stains or multiple restorations are present, conservative porcelain veneers may be a better solution.
Indications differ for a single tooth that has darkened from the inside. When discoloration originates within a pulpless tooth after trauma or root treatment, internal bleaching nonvital teeth may be the least invasive option. The tooth should be comfortable, the root filling well sealed, and a radiograph should show healing bone. Any decay, leaking margins, or cracks are addressed first to prevent relapse. Teeth with thin roots, existing external resorption, very large posts, or significant structural loss are poor candidates; in those cases, durable crowns and bridges may restore both strength and color.
Setting goals matters. Whitening aims to blend the treated tooth or teeth with neighbors, not create an unnaturally bright result. Shade change varies with starting color, enamel thickness, and daily habits. If you are unsure which path fits your situation, a brief evaluation can clarify cause and options; see our current hours. A careful diagnosis leads to predictable, natural-looking outcomes.
Step-by-Step Treatment Procedure
The procedure follows a clear sequence. First, the tooth is tested and X-rayed to confirm it is stable and well sealed. Next, a small opening is made on the back, a protective barrier is placed inside, and a gentle whitening paste is sealed in temporarily. You return after a few days to compare color, repeat if needed, then finish with a lasting restoration.
Picture this: you notice one front tooth looks darker in photos. At the first visit, your dentist reviews symptoms, checks the bite, and confirms the root filling and surrounding bone look healthy. The tooth is isolated, and stain-holding material is removed from the internal chamber only. A firm barrier is placed over the root filling above the gumline to protect nearby tissues, then an oxidizing paste is placed in the chamber and the access is closed with a temporary filling.
During the waiting period, the oxidizer lightens the dentin from the inside. Heat is not used. At the follow-up, the temporary is removed and the shade is compared to neighbors under clean lighting. If more change is needed, fresh paste is placed and the tooth is resealed for several more days. Once the color blends, the whitening paste is removed and the chamber is rinsed and dried. Many dentists allow a short pause before bonding the final filling so the tooth color stabilizes and adhesive bonding is reliable.
Special situations can alter the plan. If the canal filling is short or a leak is found, that is corrected before any lightening. If a metal post is present, access may be limited, and alternatives such as selective masking or a crown may be discussed. The procedure is conservative, focused on preserving outer enamel, and is a standard approach within internal bleaching nonvital teeth care.
Most patients report little discomfort, and visits are short. If dental anxiety is a barrier, ask about supervised oral sedation options. Your dentist will guide maintenance and timing of any additional cosmetic steps so the result stays even. A careful sequence keeps the process safe and predictable.
Managing Patient Expectations
Good planning helps you know what to expect from lightening one dark tooth. The goal is a natural blend with the neighbors, not a bright-white outlier. You may see gradual change over several short visits, with small adjustments between appointments. You have a school photo in two weeks and want the tooth to stop drawing attention.
Color change varies because stains sit at different depths inside dentin. Older trauma stains and very gray or brown shades can take longer to lighten, and some teeth reach a point where further change is minimal. The tooth can look slightly lighter right after the material is removed, then settle to a stable shade as it rehydrates over several days. Because oxygen from whitening can briefly affect adhesives, your dentist may wait a short time before placing the final bonded filling so color and bonding remain stable. With internal bleaching nonvital teeth, the target is a quiet match in normal light and at conversational distance.
Comfort is usually good. You can chew gently, but avoid cracking hard foods on the treated tooth while it has a temporary seal. Rarely, gumline irritation or root surface changes can occur if strong chemicals are used without a proper internal barrier; careful technique reduces this risk. Tooth strength depends on how much healthy structure remains. If the tooth has thin walls, a large post, or cracks, your dentist may recommend strengthening options and discuss how color goals fit with long-term safety.
Results are durable, though natural teeth around the treated one can change with time and habits. If a small color edge or translucent spot remains, a tiny polish or a sliver of bonding can refine the look after the shade has stabilized. Plan treatment around important events, allowing time for checks and any finishing touches. Your dentist will outline maintenance, including when to review the shade and how to protect the result.
Clear goals and a simple timeline keep the outcome predictable and natural.
Potential Risks and Complications
Most patients do well, but internal tooth lightening has possible downsides. The color may not match on the first try, or it can drift slightly over time. Temporary tenderness or a strange taste can happen if material leaks. With internal bleaching nonvital teeth, these risks are usually low when cases are chosen and sealed carefully.
Real-world example: you look in the mirror and notice the tooth looks brighter than its neighbor. Over-lightening or patchy change can occur if stains sit at different depths or if a metal post blocks lightening from inside. Translucent edges can appear more visible in very thin enamel. These effects are cosmetic, not harmful, and are often managed by adjusting the number of sessions or by adding a small amount of bonding after the shade settles.
During treatment, a small opening and a temporary filling are used. If the temporary wears or loosens, the paste can taste bitter and irritate the nearby gum. Call your dentist if you notice a new gap or rough edge so the seal can be restored. Neighboring teeth or gums may feel tender from the isolation clamp or from cleaning, which usually settles within a day.
Sometimes the result is limited by conditions inside the tooth. Very dark stains from past injury, large posts, or thin walls can reduce how much change is possible. In those situations, a staged plan is helpful. Lighten the tooth as much as is safe, then consider small masking changes or future coverage if strength is a concern.
Longer term, the shade can slowly shift with diet and habits, and a touch-up may be discussed at routine visits. Rare adverse changes can occur when strong chemicals or heat are used, so modern techniques rely on gentle agents placed at body temperature and careful isolation. Good records, photos, and follow-up checks help catch small issues early and keep the tooth comfortable and natural-looking.
Thoughtful planning and follow-up make a safe, steady result more likely.
Aftercare and Maintenance Tips
After internal bleaching, keep the temporary seal intact, keep the area clean, and watch for changes. Chew gently on the tooth until the final restoration is placed. Avoid heavy biting, and call your dentist if the temporary feels loose or you notice a new bitter taste. These simple steps protect the result while the color stabilizes.
On day three, you sip coffee and wonder what is safe. During the active whitening phase, limit dark liquids like coffee, tea, and red wine, or use a straw and rinse with water afterward. Do not smoke or vape, since smoke stains and can irritate healing tissues. Gentle brushing with a soft brush and daily flossing keep the margin clean so the temporary seal lasts until your follow-up.
Some people feel mild, short-lived sensitivity. A fluoride or desensitizing toothpaste can help, and lukewarm drinks are usually more comfortable. Avoid very hard foods, ice, and taffy on the treated tooth until it is permanently restored. If the gum near the tooth feels irritated, rinse with warm salt water for a day and monitor. Call if you see swelling, a persistent pimple on the gum, or a cracked temporary.
Your dentist may wait a short period before placing the final bonded filling so adhesives perform well and the shade is stable. During this time, maintain normal hygiene and keep scheduled checks so small shade differences can be corrected before the tooth is sealed permanently. Once finished, care is straightforward. Brush twice daily, floss, and consider a nightguard if you clench or grind, which protects the edges and any bonding.
Long term, color usually holds, but natural neighboring teeth can change with habits and age. If the single tooth seems to drift from the match, mention it at routine cleanings. A quick photo and shade check guide whether a small touch-up or polish is useful. For internal bleaching nonvital teeth, early attention keeps maintenance minimal and results natural. Protect the seal, keep the area clean, and report changes promptly.
Small daily habits protect the work and preserve the match.
Long-Term Outcomes of Treatment
Most internally bleached nonvital teeth stay lighter and comfortable for years. The shade settles in the first weeks, then remains fairly stable. Mild shifts can occur as neighboring natural teeth age, but small touch-ups or selective bonding can keep the match. With careful technique and a tight seal, the tooth functions like its neighbors.
Six months later, you compare photos and the tooth still blends. Color stability depends on the cause of discoloration, the depth of internal stains, and the quality of the final seal. The oxidizer breaks down pigments within dentin; once it is removed and the chamber is sealed, new stains enter slowly. Teeth darkened by older trauma or very deep brown-gray stains may not reach a perfect match, and they can drift slightly with time. Even then, the change is usually gradual and easy to fine-tune.
Long-term health also relates to the seal over the root filling and the barrier inside the crown. A firm internal barrier reduces irritation risk and keeps materials where they belong. Gentle agents at body temperature are used, not heat, which supports tissue safety. Regular exams allow your dentist to confirm that the bite feels natural, the margins stay closed, and the surrounding bone and ligament look healthy on radiographs.
Tooth strength is more about how much healthy structure remains than the bleaching itself. Because the treatment works from inside, outer enamel is preserved. If a tooth starts with thin walls, a large post, or a crack, strengthening steps may be discussed to support chewing. A well-bonded final restoration helps resist leakage and wear. If you clench or grind, a nightguard can protect edges and any bonding so the color and shape last.
Relapse, when it happens, tends to be mild. A brief re-entry with fresh material, or a tiny area of bonding, often restores the blend quickly. Plan important events with time for shade checks and finishing. At routine visits, your dentist will record shade, review habits, and advise on any simple maintenance. For internal bleaching nonvital teeth, steady follow-up keeps results natural over the long run.
Frequently Asked Questions
Here are quick answers to common questions people have about Lightening One Dark Tooth Safely in Glendale, AZ.
- What is a nonvital tooth?
A nonvital tooth is one where the pulp, which contains nerves and blood vessels, has died or been removed. This can happen due to deep decay, injury, or a crack. When the pulp dies, discoloration can begin because pigments from blood and tissue seep into tiny channels inside the tooth. Such teeth may appear darker or gray and can sometimes feel different when biting.
- How effective is internal bleaching for nonvital teeth?
Internal bleaching is often effective in lightening nonvital teeth to match their neighbors. The process involves placing a whitening agent inside the tooth to target internal discoloration. The success depends on factors like the depth of stains and the initial shade of the tooth. Most cases see noticeable improvement within a few sessions. A protective barrier is used to minimize irritation.
- Are there risks associated with internal bleaching of nonvital teeth?
While generally safe, internal bleaching carries some risks. Possible side effects include temporary sensitivity, irritation if materials leak, and rare cases of root resorption. These are minimized by using gentle whitening agents and a firm barrier to protect surrounding tissues. Case selection by a dentist plays a crucial role in avoiding complications.
- How long does the internal bleaching process take?
The internal bleaching process typically requires one to three dental visits. Each visit involves evaluating the shade, applying a whitening agent, and allowing it to work inside the tooth for a few days. Follow-up visits help ensure the color matches neighboring teeth, and adjustments are made as needed to achieve the desired shade.
- How long do the results of internal bleaching last?
The results of internal bleaching can last for several years. The initial shade stabilizes within weeks, and further changes are usually gradual. Long-term color retention depends on factors like the quality of the seal over the tooth and the initial cause of discoloration. Regular dental check-ups help monitor and maintain the tooth’s appearance over time.
- Can internal bleaching be done on all nonvital teeth?
Internal bleaching is not suitable for all nonvital teeth. Teeth with large posts, thin walls, or previous severe damage may not be good candidates. A dentist assesses each case individually, considering factors like tooth structure and existing restorations. In some situations, alternative treatments such as crowns or veneers may be recommended instead.
- What should I do if my temporary filling feels loose after internal bleaching?
If your temporary filling becomes loose, contact your dentist promptly. A loose filling can allow the whitening agent to leak, causing a bitter taste or gum irritation. Protect the seal by avoiding hard foods and keep the area clean until you can attend a follow-up appointment for resealing.