Understanding Etch and Rinse Technique
Etch and rinse is a bonding method that uses a gentle acid gel, a water rinse, then an adhesive. The etch roughens enamel and prepares dentin so adhesive can flow in and harden, locking to the tooth. Done correctly, it helps margins look smooth and stay sealed over time.
Picture a small chip on a front tooth. Enamel responds very well to phosphoric-acid etching, creating tiny pores that boost bonding. Dentin is different, so it needs shorter etch times and gentle drying to keep its fibers open. Compared with self-etch systems, etch and rinse often gives crisper enamel margins, which many notice in etch and rinse vs self etch esthetics. Technique choice also affects long-term bond quality and interface durability [1]. These details guide careful dental bonding.
To help etch-and-rinse margins succeed, clinicians focus on a few essentials:
- Keep the field dry with good isolation.
- Selective enamel etch around margins for strong micro-retention.
- Brief dentin etch, then leave dentin slightly moist before adhesive.
- Thorough primer and adhesive application, then complete light curing.
- Avoid saliva contamination; if it happens, clean, re-etch, and reapply.
Saliva contamination lowers bond strength and can increase marginal staining; re-etching and reapplying adhesive can restore performance [2].
Sensitivity can occur if deep dentin is over-etched or if resin monomers reach the pulp; careful technique and thin adhesive layers help reduce this risk [3]. For esthetic work like porcelain veneers, sharp enamel margins and controlled etching help blends that stay bright and natural. Understanding this technique sets up durable, attractive margins. The right etching approach builds beauty and durability.
Exploring Self-Etch Systems
Self-etch systems use an acidic primer that both conditions the tooth and primes it in one step, without a rinse. They are gentle on dentin and reduce technique sensitivity because the tooth does not need to be dried to a precise level. On enamel, their performance depends on how acidic the adhesive is. Understanding these details helps create smooth, clean margins that last.
Picture a small back tooth filling placed under a rubber dam. The self-etch primer softens the thin smear layer and flows into the tooth surface at the same time, forming a tight seal. Because dentin stays hydrated, there is less risk of over-drying or collapsing the collagen network. This often means fewer sensitivity issues and more consistent bonds on the inner tooth. Enamel is harder and more mineralized, so shallow etching from mild self-etch primers can leave margins less defined if used alone.
For crisp margins and color stability, many clinicians add a brief selective enamel etch before applying a self-etch adhesive. This simple step strengthens the enamel bond and can reduce marginal staining over time [4]. Universal adhesives used in self-etch mode may gain durability when an extra thin hydrophobic resin coat is applied after the adhesive. That added layer can limit water movement in the interface and support long-term bond strength, helping margins stay smooth and bright [5]. When comparing etch and rinse vs self etch esthetics, these small adjustments often make the visible difference.
For patients, self-etch approaches can shorten visits and lower the chance of post-treatment sensitivity, especially for small to medium fillings. They are also useful when keeping the tooth perfectly dry is challenging, though careful isolation still matters. In areas where enamel defines the smile line, selective enamel etch and careful finishing help the restoration blend. Used thoughtfully, self-etch systems support attractive, durable margins.
Comparative Analysis of Etching Strategies
Both etch-and-rinse and self-etch strategies can produce smooth, durable margins when used correctly. Etch-and-rinse often delivers the sharpest enamel margins, while self-etch provides more controlled bonding to dentin with less risk of sensitivity. Many clinicians blend approaches, using selective enamel etch with a self-etch or universal adhesive to balance esthetics and durability. The best choice depends on the tooth surfaces involved, isolation, and the visibility of the margin.
Picture a small front-tooth repair in bright light. Phosphoric-acid etching in an etch-and-rinse strategy creates deep enamel micro-retention, so margins finish crisp and resist early staining. On dentin, however, etching and rinsing removes minerals more deeply, so success hinges on gentle drying and thorough priming. Self-etch strategies partially dissolve the smear layer and infiltrate at the same time, which protects the collagen network and helps create consistent dentin bonds. The trade-off is shallower enamel etching, which can soften the margin outline if enamel is not selectively etched first.
Long-term margin quality relates to how well the bonded interface resists water movement and wear. Etch-and-rinse with careful isolation can create a dense hybrid layer that finishes beautifully and holds polish. Self-etch adhesives are efficient and less technique sensitive, and they reduce the chance of post-operative zing because dentin stays hydrated. For color-critical edges, a brief selective enamel etch before a self-etch or universal adhesive often sharpens the line and supports stain resistance. In everyday practice, etch and rinse vs self etch esthetics largely reflect where the margin sits, how dry the field can be kept, and whether enamel or dentin dominates the edge.
For patients, the goal is a margin that disappears to the eye and stays sealed. Small, enamel‑heavy repairs often favor selective enamel etch for a bright blend, while deeper dentin areas may benefit from self-etch steps that limit sensitivity. Your dentist can tailor the sequence to each tooth and situation so the restoration looks natural and lasts. Thoughtful strategy choices keep margins beautiful and strong.
Factors Influencing Marginal Esthetics
Marginal esthetics depend on the tooth surface involved, the bonding approach, and how well the area is kept dry. Material selection, curing and finishing steps, and where the margin sits on the tooth also matter. Small differences in technique can change how sharply a margin blends and how it resists stain over time.
A patient notices a faint dark line along a filling edge. Enamel favors stronger conditioning, so selective phosphoric-acid etching can produce a crisp, bright outline. Dentin prefers gentler treatment that preserves moisture, which supports consistent bonding and reduces sensitivity. These substrate differences often drive choices in etch and rinse vs self etch esthetics and explain why selective enamel etch is common near the smile line.
Polymerization shrinkage can pull composite away from the margin, leaving a tiny gap that later picks up stain. Using small increments, careful light placement, and controlled curing helps limit stress and keeps edges tight. After curing, removing the oxygen-inhibited layer and refining with fine finishing instruments lower surface roughness, which reduces plaque and pigment retention. Smooth, well-polished margins reflect light evenly and hide transitions.
Isolation is central. Even brief contact with saliva or blood can weaken bonds and harm color stability, so rubber dam or well-placed retraction and suction pay off. Hemostatic gels should be rinsed completely, since residues can interfere with adhesives. Margin location matters too. Enamel margins usually look sharper and stain less than those placed on cementum or dentin. Heavy bite forces, especially on thin edges, can wear or chip margins, so occlusal adjustment and proper contour protect the finish line. For indirect work, accurate scans or impressions, precise fit, thorough cement cleanup, and final polishing support clean, invisible edges, which is essential for well-fitting crowns and bridges.
For patients, good margins disappear to the eye and stay smooth between cleanings. Thoughtful control of substrate, isolation, curing, and finishing helps restorations blend on day one and remain bright later. Small technique choices make a visible difference.
Durability of Bonded Margins
Durable bonded margins stay sealed against water, stain, and chewing forces. They come from a clean tooth surface, the right adhesive steps for enamel and dentin, steady isolation, and thorough light curing. When these pieces work together, the margin keeps its shape, resists wear, and remains hard to see.
A small filling edge starts to catch stain after a year. Often, the cause is tiny leakage where resin and tooth meet. Strong, lasting margins form when adhesive fully wets the prepared surface and penetrates the microtexture before polymerizing. Good isolation limits saliva and blood, which can block resin flow. After curing, careful finishing smooths the transition so it sheds plaque and pigment more easily.
Enamel and dentin age differently under a restoration, so durability depends on matching the technique to each. Enamel bonds last when the surface is clean, well‑etched, and fully infiltrated with adhesive, which creates a hard, stable interface. Dentin is moist and contains collagen, so preserving gentle moisture while priming helps the adhesive form a uniform layer that resists water movement. These choices also relate to appearance. Differences seen in etch and rinse vs self etch esthetics often mirror how each approach handles moisture, depth of conditioning, and stress over time.
Chewing load and margin location matter too. Thin edges under heavy bite can chip or flex, so shaping contacts and building adequate bulk near the margin protect the seal. For indirect work, precise fit and complete removal of excess cement reduce roughness and help the margin stay clean. If you plan professional teeth whitening, well‑sealed margins help the color change look even across tooth and restoration. Ask your dentist how the preparation, adhesive steps, and finishing plan support long‑term seal and color stability. Strong margins look better and last longer.
Application Techniques for Optimal Results
Optimal results come from matching the bonding steps to enamel and dentin, keeping the field dry, and curing thoroughly. Good application techniques help margins look smooth on day one and resist stain later. Careful timing, active adhesive placement, and smart light curing make a visible difference.
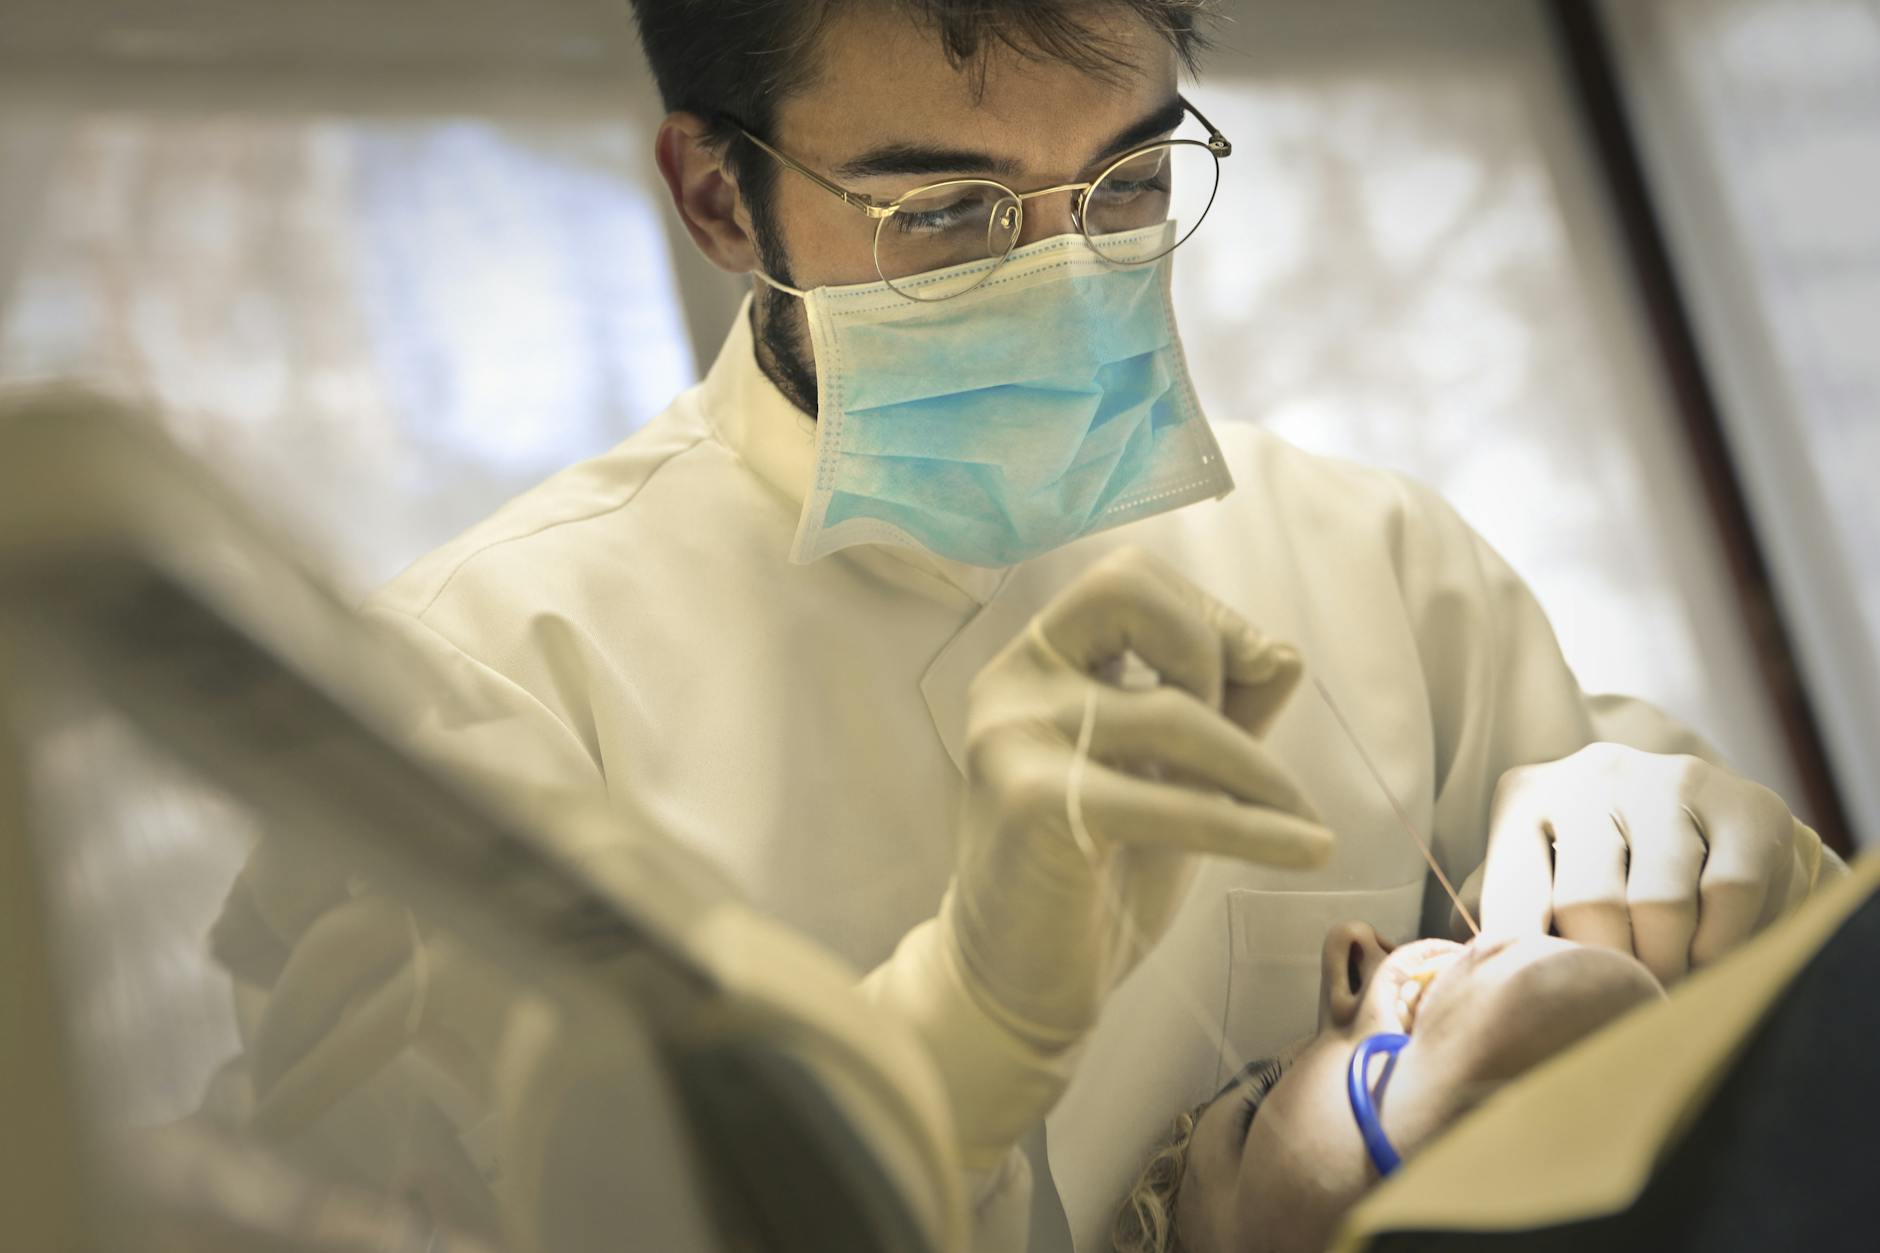
In a back tooth near the gum, a small composite is placed. First, isolate with a rubber dam or well‑managed retraction and suction so saliva and crevicular fluid stay away. If using etch‑and‑rinse, limit dentin etch time and blot to a moist, satin look before adhesive. With self‑etch or universal systems in self‑etch mode, do not pre‑dry dentin; let the primer work on a naturally hydrated surface. Actively scrub adhesive for 10 to 20 seconds, then evaporate solvent with gentle, oil‑free air until the surface stops moving and looks glossy.
For crisp enamel outlines, selectively etch only the enamel margin for about 10 to 15 seconds, rinse, and dry to a frosty appearance before adhesive. Apply a thin, even adhesive layer, air‑thin to avoid pooling, and cure from more than one direction for complete polymerization. In deeper or darker areas, increase curing time or angle the light to reach shadowed zones. Place composite in small increments, shaping each layer and curing fully to limit shrinkage stress and protect the seal.
If contamination happens, rinse immediately, refresh the surface, and repeat the adhesive step; brief re‑etching of enamel helps restore energy for bonding. Rinse hemostatic gel residues thoroughly, since leftover salts can interfere with adhesion. Before finishing, place a tiny amount of glycerin over the margin and give a final light to seal the oxygen‑inhibited layer, then polish with fine instruments for a smooth, plaque‑resistant edge. A very thin additional hydrophobic resin coat before the last cure can improve gloss and reduce water movement at the interface.
For patients, these steps help your restoration blend in, feel comfortable, and stay bright. Technique choice and sequence explain much of the difference in etch and rinse vs self etch esthetics where the margin meets your smile. If you are curious, ask how isolation, curing, and finishing are planned for your tooth. Small technique choices lead to clean, durable margins.
Clinical Considerations for Etch Selection
Choose an etch strategy by looking at where the margin sits, what tooth structure dominates, and how dry you can keep the area. Enamel-heavy margins usually benefit from phosphoric-acid etching, while dentin-heavy areas often favor self-etch or universal adhesives in self-etch mode. The goal is a clean look on day one and a seal that holds up over time.
Picture a small chip near the smile line. Enamel is hard and highly mineralized, so a brief phosphoric-acid etch often creates strong micro-retention and sharp edges. Dentin is moist and more sensitive; self-etch systems condition and prime at once, interacting with the smear layer while helping the collagen stay open for resin entry, which supports a steady bond [6]. When enamel and dentin meet at the same margin, selective enamel etch followed by a self-etch or universal adhesive balances strength and control. When weighing etch and rinse vs self etch esthetics, margin visibility and substrate guide the choice.
Technique matters as much as product. With universal adhesives, actively scrubbing the adhesive and using a brief selective dentin etch can improve immediate and long-term dentin bond strength, which supports both seal and finish quality [7]. Isolation also drives success. Even short saliva or fluid contact can lower bond strength and harm marginal integrity, so contamination control and surface refresh steps are critical when mishaps occur [8]. Finally, match curing time and light angle to the cavity depth to avoid uncured zones at the edge.
For patients, these choices help a restoration blend in and stay comfortable. If your margin is mostly on enamel, your dentist may favor stronger enamel conditioning; if it sits on dentin, a gentler self-etch path can limit sensitivity while keeping the seal. Thoughtful etch selection supports a natural look and steady performance. The right etch choice makes margins last and look better.
Patient Outcomes with Different Methods
Both etch-and-rinse and self-etch methods can lead to fillings that look natural, feel comfortable, and last. Etch-and-rinse often gives the sharpest enamel edges, while self-etch can reduce technique sensitivity and shorten visits. The best outcomes depend on which tooth surfaces are involved and how well the area is kept dry.
After a filling, someone feels cold sensitivity for a week, then it fades. Patients treated with an etch-and-rinse approach may notice very crisp margins on front teeth, which helps the blend under bright light. Self-etch approaches tend to keep dentin hydrated during bonding, so short-term sensitivity is often lower. In areas where enamel frames the smile, selective enamel etching can sharpen the outline, regardless of which adhesive is used.
Color stability and stain pickup relate to the seal at the edge. A strong enamel bond from phosphoric-acid etching resists early staining and keeps the line hard to see. Self-etch systems can match this esthetic result when enamel is selectively etched and the adhesive is applied actively, then well cured. Many day-to-day differences in etch and rinse vs self etch esthetics come down to enamel conditioning and careful finishing.
Comfort during chewing and with temperature changes depends on how well dentin is sealed. Self-etch primers condition and prime at the same time, which can create more consistent dentin bonds and fewer “zings.” Etch-and-rinse can feel great too when dentin is not over-etched, the adhesive is well saturated, and light curing is complete. With either method, small increments of composite and smooth polishing help the bite feel natural.
Longevity follows the quality of isolation, adhesive handling, and curing. When the field stays dry and the adhesive fully wets the surface, margins resist water, wear, and stain. Repairs are possible with both methods if a touch-up is ever needed. If you have questions about comfort, color, or upkeep, ask how the adhesive steps were matched to your tooth. Clear technique leads to clear outcomes.
Visualizing Marginal Integrity
Marginal integrity is how well a restoration meets the tooth without a visible or physical gap. We visualize it by looking at how light reflects at the edge, by gently drying, and by feeling for steps or catches. A good margin blends into the tooth so you cannot see or feel where it starts. A poor margin may show a dark line, a white stress line, or a ledge you can feel.
In bright bathroom light, someone notices a faint edge by a filling. Clinically, drying with air makes a tight margin look continuous, while gaps or roughness show as shadows or chalky halos. Transillumination and angled overhead light can highlight tiny steps that normal lighting hides. A smooth explorer pass that does not catch is a good sign. Floss that shreds or snags between teeth can signal an overhang. When margins sit just under the gum, gentle retraction helps reveal the true edge for inspection and finishing. These checks also help compare etch and rinse vs self etch esthetics in areas where enamel defines the smile line.
Surface texture changes what you see. A well‑polished margin reflects light evenly, so the transition seems to disappear. A rough or under‑cured edge looks dull and gathers stain, which outlines the seam. A bright “white line” at enamel can mean local stress or micro‑chipping; refining the contour and repolishing often improve the look. For indirect restorations, try‑in under dry field, thin probe checks, and high‑magnification photos help confirm a flush edge before final cementation. Bite paper marks and gentle chewing tests can reveal high spots that would otherwise chip a thin margin.
For patients, this means a clean edge that is hard to see and easy to clean. At home, notice changes in color or areas where floss snags, and tell your dentist. In the office, simple light, air, tactile checks, and careful photos catch small issues early, so margins stay bright and comfortable. Clear visualization leads to cleaner, longer‑lasting results.
Research Trends in Etching Methods
Recent research points to a balanced approach to tooth etching. Studies favor strong conditioning for enamel when needed, and gentler steps for dentin that protect moisture and fibers. Universal adhesives used with selective enamel etching are common in newer protocols. The goal is a clean look and a seal that lasts.
At a checkup, a dentist reviews a faintly stained margin under magnification. Lab evidence shows that how long enamel is etched with phosphoric acid can change the bonding performance of universal adhesives, which guides clinicians toward controlled, not excessive, enamel etch times [9]. This supports a trend toward selective enamel etching near visible margins, while keeping dentin conditioning mild. Together, these choices help edges look crisp and resist early stain.
On dentin, current studies emphasize simple, consistent steps that limit over‑drying, encourage active adhesive scrubbing, and ensure full solvent evaporation before curing. Researchers also examine how materials interact across systems. For example, compatibility between self‑etch adhesives and dual‑cure core materials has been evaluated, reminding clinicians to confirm that their adhesive and core choices work well together in deeper or darker areas where light may not reach fully [10]. These findings fit with everyday goals of reducing sensitivity, supporting full cure, and preserving smooth, bright margins.
Another theme is durability under moisture and time. Work on universal adhesives and selective enamel etch suggests that strong enamel bonds and controlled dentin conditioning can improve marginal stability without adding many steps [9]. At the same time, attention to compatibility, curing direction, and shadowed zones helps prevent weak spots at the edge [10]. When comparing etch and rinse vs self etch esthetics, these research trends point toward matching etch strength to the surface, managing moisture carefully, and curing completely.
For patients, this means edges that blend in and stay comfortable. As techniques evolve, your dentist can choose the simplest path that protects the seal and the smile. Good research is shaping cleaner, longer‑lasting margins.
Impacts of Surface Treatment on Esthetics
Surface treatment is how we prepare tooth and restoration surfaces before bonding and polishing. It shapes how edges look, how well colors match, and how long margins stay bright. Proper treatment creates a clean, high-energy surface for the adhesive, then a smooth finish that reflects light evenly. The result is a margin that blends in and resists stain.
Picture a small front-tooth repair under bright light. On enamel, phosphoric-acid etching creates deep micro-porosity, which helps the composite finish with a crisp, sharp outline. Over-etching or rough drying can stress the edge, so timing and gentle air are important. Self-etch primers treat enamel more mildly, which can soften the outline if used alone, so a brief selective enamel etch often sharpens the finish. When comparing etch and rinse vs self etch esthetics, the depth and control of enamel conditioning make the visible difference.
Dentin benefits from gentler conditioning that keeps collagen hydrated. Self-etch approaches limit over-drying and form a consistent bond, which helps color stay stable along deeper margins. On either substrate, active adhesive scrubbing and thorough solvent evaporation improve wetting, so resin flows into the microtexture before curing. After bonding, a careful polish reduces surface roughness, which lowers plaque and pigment pickup and keeps the transition line hard to see.
Restoration surfaces matter too. Fresh composite layers bond best when the oxygen-inhibited layer is managed, then sealed and polished to a fine gloss. For glass ceramics, hydrofluoric-acid etching and silane promote strong micromechanical and chemical coupling, helping thin cement lines disappear optically. Zirconia does not etch the same way, so gentle air abrasion and use of a phosphate monomer primer support bond strength and stable color at the edge. Clean handling throughout, including rinsing away hemostatic residues and avoiding saliva contact, preserves both bond quality and appearance.
For patients, these steps mean margins that vanish in normal light and stay easy to clean. Good surface treatment supports a natural look on day one and helps it last. Thoughtful preparation and finishing protect both seal and smile.
Future Directions for Restorative Techniques
Restorative dentistry is moving toward simpler steps that still deliver stronger, cleaner margins. Future techniques aim to match treatment precisely to enamel and dentin, reduce sensitivity, and keep color stable. Expect materials and lights that work together to create reliable bonds with fewer variables.
Picture a small chip repaired in one calm visit. New universal adhesives are being tuned for selective enamel etching, then followed by a thin hydrophobic overcoat that blocks water at the interface. This two-layer idea improves polish and helps margins resist stain. On dentin, primers that protect collagen and limit enzyme activity may slow bond aging, while bioactive fillers that release calcium or phosphate could support a steadier seal in deeper areas.
Materials are also targeting lower stress. Composites with reduced shrinkage and smarter photoinitiators let clinicians cure more completely with less pull at the edge. Multi-angle, higher-output lights and guided curing times help resin set evenly, especially in shadowed zones and around translucent enamel. For esthetics, shade-mapping tools and better tints make the transition line harder to see. These updates clarify differences often noticed in etch and rinse vs self etch esthetics, helping clinicians choose the simplest path that protects the smile line.
Surface preparation is evolving too. Gentle air abrasion, laser micro-texturing, or plasma treatment may raise surface energy without over-etching, so adhesives wet the tooth predictably. Digital workflows are adding precision at finish lines. Intraoral scanning, 3D-printed matrices, and isolation aids help shape margins that polish quickly and stay smooth. For indirect work, improved cements and primers are being matched to each ceramic or zirconia to keep the cement line thin and clean.
What this means for patients is straightforward. Restorations should blend in more easily, feel comfortable sooner, and hold their color longer, with fewer steps chairside. If you are planning care, you can check our current hours before your visit. Thoughtful, simpler techniques are making margins stronger and less visible.
Frequently Asked Questions
Here are quick answers to common questions people have about Etch Strategy for Beautiful, Durable Margins in Glendale, AZ.
- What is the main difference between etch-and-rinse and self-etch techniques?
The primary difference between etch-and-rinse and self-etch techniques is how they prepare the tooth surface for bonding. Etch-and-rinse uses a separate phosphoric acid application with a rinse step, which creates deep micro-etching especially for enamel, providing sharp margins. In contrast, self-etch uses a combined acidic primer that conditions and primes without a rinse, simplifying the process and reducing sensitivity, especially on dentin. The choice affects both esthetics and bond strength of the final restoration.
- How does saliva contamination affect dental margins?
Saliva contamination can weaken the bond between the tooth and the restorative material, often lowering bond strength and increasing the risk of marginal staining. If saliva contacts a prepared tooth surface, it can block resin flow, jeopardizing adhesion. Immediate cleaning, surface refreshing, and reapplying adhesive can restore performance. Isolation techniques like rubber dams are crucial to prevent saliva interference during procedures.
- Why is selective enamel etching beneficial?
Selective enamel etching targets only the enamel margins with phosphoric acid, enhancing micro-retention and strengthening the bond. This process sharpens the enamel outline, making the restoration blend better with the natural tooth while maintaining esthetic quality. It is especially useful in areas where enamel visibility is critical, helping to achieve better esthetic outcomes and marginal integrity over time.
- Can both etch-and-rinse and self-etch systems provide durable restorations?
Yes, both etch-and-rinse and self-etch systems can create durable restorations when applied correctly. Etch-and-rinse systems often achieve sharper enamel margins, while self-etch systems are effective on dentin. The choice between them depends on factors like substrate type, isolation capabilities, and desired esthetic outcomes. Proper application builds a bonded interface that resists water and wear, ensuring long-term durability.
- How do clinicians ensure optimal application of adhesives?
Optimal adhesive application involves precise timing, creating a dry field, and thorough curing. For etch-and-rinse, careful control of etch time on dentin and maintaining slight moisture before adhesive application is important. With self-etch, adhesives should be actively scrubbed onto naturally hydrated dentin. Complete polymerization through multi-directional light curing, assisted by final polishing, ensures a durable and esthetically pleasing restoration.
References
- [1] Toward a Functional and Conceptual Framework for Adhesive Materials: The Role of Etching Technique. (2026) — PubMed:41744957 / DOI: 10.3390/dj14020119
- [2] Adverse effects of salivary contamination for adhesives in restorative dentistry. A literature review. (2017) — PubMed:29178762
- [3] In-vitro transdentinal diffusion of monomers from adhesives. (2018) — PubMed:29864446 / DOI: 10.1016/j.jdent.2018.05.023
- [4] The Selective Enamel Etch Technique. (2024) — PubMed:38900462
- [5] The effect of an extra hydrophobic resin layer on the bond strength and durability of one-step universal adhesives used as a primer. (2023) — PubMed:37308054 / DOI: 10.1016/j.jdent.2023.104568
- [6] Physiochemical interactions at the interfaces between self-etch adhesive systems and dentine. (2004) — PubMed:15386864 / DOI: 10.1016/j.jdent.2004.06.005
- [7] Effect of Active Bonding Application after Selective Dentin Etching on the Immediate and Long-Term Bond Strength of Two Universal Adhesives to Dentin. (2022) — PubMed:35335459 / DOI: 10.3390/polym14061129
- [8] Influence of dentin conditioning and contamination on the marginal integrity of sandwich Class II restorations. (2000) — PubMed:11203848
- [9] Impact of Phosphoric Acid Etching Duration on the Bonding Performance of Universal Adhesives on Enamel: A Systematic Review of Laboratory Studies. (2025) — PubMed:41294137 / DOI: 10.1111/jerd.70057
- [10] Compatibility of Dual-Cure Core Materials with Self-Etching Adhesives. (2025) — PubMed:40710122 / DOI: 10.3390/dj13070276